
Moving day can make every box feel urgent. It is easy to look around a new house and think you need to unpack, organize, repair, clean, shop, and decorate all at once. You do not.
The goal of your first week is not to finish the house. It is to make it safe, functional, and comfortable enough to start living in it.
Start with security and basic systems. Then set up the rooms you need every day. Once the essentials work, you can unpack gradually and learn how the home fits your routines. That order prevents important checks from getting buried beneath less urgent projects.
If you are wondering what to do first after moving into a new house, use this short answer: secure the home, confirm that the utilities work, locate the main shutoffs, test the alarms, unpack your essentials, and organize everything else a little at a time.
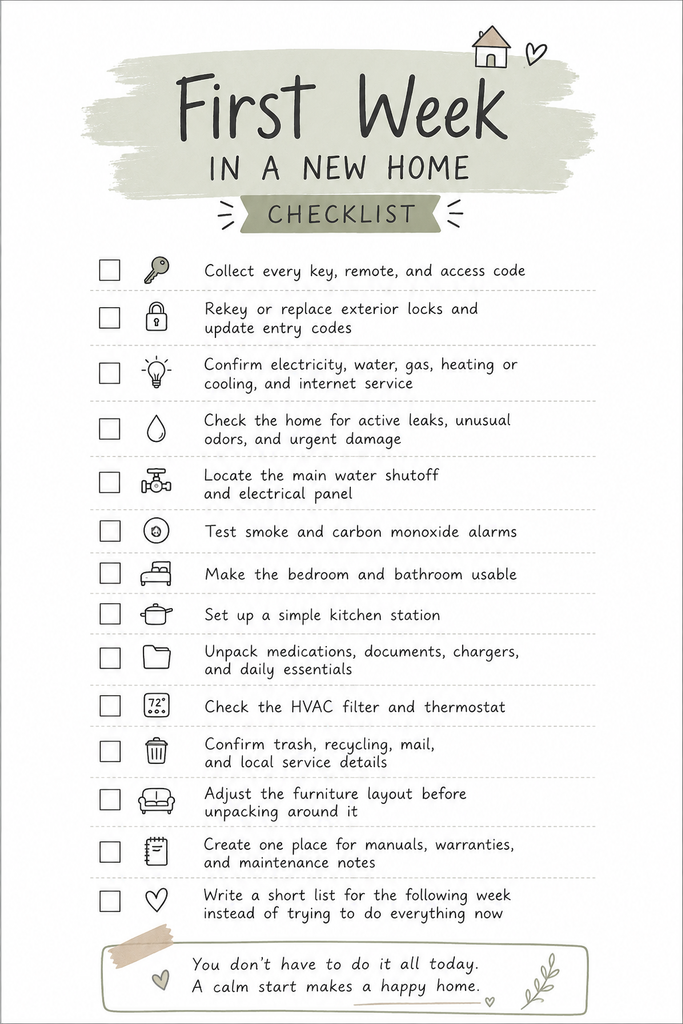
First Week in a New Home Checklist
Use this as a quick overview. The rest of the guide explains each task and when to handle it.
Day 1: Make the Home Secure
Before you focus on boxes, make sure you control who can enter the property.
Collect and test all exterior-door keys, mailbox keys, garage remotes, gate controls, and smart-lock information provided at closing. Do not assume that receiving two front-door keys means those are the only copies in existence.
For a purchased home, arrange to have exterior locks rekeyed or replaced. Rekeying is often sufficient when the hardware is in good condition; a locksmith can advise you if it is damaged or mismatched.
Also reset garage-door codes, keypad combinations, smart-lock users, security accounts, connected cameras, and other electronic access.
If a device is still connected to a previous owner’s account, follow the manufacturer’s transfer instructions. Walk around while it is light and confirm that exterior doors and accessible windows latch. Look for immediate hazards such as a broken pane, loose step, or missing handrail—not cosmetic projects.
Day 1: Confirm the Essential Utilities
Confirm that the home can support an ordinary night. Turn on several lights, run hot and cold water, flush the toilets, and check whether the HVAC system responds to the thermostat. Verify that the refrigerator and any necessary property-specific equipment have power.
Watch for pooled water, a running toilet, damp stains, burning or gas-like odors, sparking or hot outlets, repeatedly tripping breakers, or severe HVAC noises.
If you smell gas, hear hissing near a gas line, see smoke, or suspect an immediate electrical danger, leave and contact the appropriate emergency service or utility from a safe location. Do not operate switches when a gas leak may be present. For non-emergency problems, contact the provider or a qualified professional.
Days 1–2: Locate the Shutoffs and Electrical Panel
You do not want to search for the main water shutoff while water is spreading across the floor. Find it during your first few days, when there is no emergency.
The main water shutoff may be in a basement, utility room, crawl space, garage, or outside near the meter. Identify it, clear the route, and label it without forcing a valve that looks damaged or unfamiliar. Ask a plumber, inspector, or utility if you cannot confidently identify it.
Find the electrical panel and keep it accessible. Do not remove its cover or touch internal components. Missing circuit labels can be updated later; electrical repairs belong to a qualified electrician.
If the home uses gas or propane, learn where its shutoff is and who should operate it. Procedures differ, so follow local utility guidance. Share every shutoff location with the responsible adults in the household.
Days 1–2: Test Smoke and Carbon Monoxide Alarms
Do not treat an alarm on the ceiling as proof that the home is protected. Press the test button on every smoke and carbon monoxide alarm and follow the manufacturer’s instructions. Replace missing or depleted batteries where the model allows it, and note the replacement date printed on each unit.
U.S. safety guidance recommends smoke alarms on every level, inside bedrooms, and outside sleeping areas. Carbon monoxide alarms are generally recommended on every level and outside sleeping areas. Follow product instructions and local requirements when installing or replacing them.
Do not cover alarms or remove batteries to stop nuisance alerts. Hardwired repairs belong to a qualified electrician. Keep exits clear of boxes, choose an outdoor meeting point, and make sure everyone knows how to leave.
Days 1–3: Unpack What You Need to Live Normally
The best answer to “What should I unpack first after moving?” is not “the nearest box.” Start with the things that allow you to sleep, shower, take medication, eat, communicate, and get dressed.
After moving several times, I have found it much easier to carry essentials in a suitcase or clearly marked bag instead of searching for the right box after a long day. Include medication, toiletries, toilet paper, clothes, towels, bedding, chargers, important documents, simple cleaning and food supplies, and anything a child or pet will need immediately.
Set up the bedroom first
Assemble the bed, add clean bedding and a lamp, and clear the path to the door and bathroom. You do not need to organize every item of clothing.
Make one bathroom usable
Stock one bathroom and confirm that its toilet, faucets, and drains work without leaking. One finished bathroom is more useful than three partially unpacked ones.
Create a basic kitchen station
Unpack enough kitchenware, food, and cleaning supplies for simple meals. Check beneath the sink and around connected appliances for moisture, and avoid overloading outlets with temporary appliances.
Days 2–4: Check the Systems You Will Depend On
Check the thermostat schedule and replace old owner settings with ones that suit your household. Look at the HVAC filter and note its size and condition. If it is dirty or its service history is unknown, replacement is usually a sensible starting point, provided you use the correct type and follow the system manufacturer’s instructions. Our guide on how often to change your HVAC filter explains how household conditions can change the schedule.
Run appliances after checking that visible connections look intact. Confirm that the refrigerator cools, the range operates normally, and the washer drains without leaking. For major equipment, photograph accessible model and serial number labels. Keep manuals, warranties, inspection documents, receipts, and service records together. A simple note with the equipment’s approximate age, filter size, and last known service date is enough to begin.
Days 3–5: Handle the Administrative Details
Once the house is safe and the essential rooms work, take care of the services that make everyday life smoother.
Confirm that utilities are in the correct name, your homeowners insurance is active with accurate information, and internet service is arranged if needed.
Check the trash and recycling schedule, mailbox access, relevant HOA rules, non-emergency utility contacts, and address changes as well.
Keep closing documents, insurance details, utility accounts, and emergency contacts together. Do not leave sensitive paperwork visible while movers and service providers come and go.
Days 3–7: Get the Layout Right Before Fully Unpacking
It is tempting to unpack around furniture wherever it lands. I prefer to try the basic layout briefly and change it early if something feels wrong. A sofa may interrupt the walking path, a bed may block an outlet, or a desk may receive glare all afternoon. Correcting that is easier before shelves are full.
Focus on function before decoration. Make sure people can move easily, doors and windows open fully, vents remain clear, and cords do not cross walkways. The room should support what you actually do there.
You do not need the perfect layout in seven days. Just avoid organizing an entire room around an arrangement you already dislike.
Days 4–7: Unpack Gradually and Control the Boxes
Once essential areas work, choose one room or category at a time. Randomly opening boxes creates many half-finished spaces.
A simple approach is:
- Finish daily-use items in the bedroom, bathroom, and kitchen.
- Unpack work, school, pet, or child supplies needed this week.
- Group boxes for later rooms without opening all of them.
- Create a clearly marked area for donations, returns, and packing materials.
- Break down empty boxes and move them out of hallways and exits.
Do not buy storage containers before you know what needs to be stored and where. Waiting helps you avoid products that do not fit the cabinets, closets, or your routines. There is no rule that every box must be empty by week’s end. Aim for functional rooms and clear walkways, then organize gradually.
What Can Wait Until After the First Week?
Cosmetic upgrades, nonessential furniture, decorative shopping, and most “someday” projects can wait. Unless something is unsafe or causing further damage, you will usually make better decisions after living there for a while.
Keep a short running list instead of starting every project. Divide it into three groups:
- Urgent: safety concerns, active leaks, loss of an essential service, or damage that is getting worse.
- Soon: minor repairs or setup tasks that affect daily life but are stable.
- Later: decorating, upgrades, and organizational improvements that benefit from more thought.
This prevents a loose cabinet handle and a leaking pipe from appearing equally important.
Frequently Asked Questions
What should I do first when I move into a new home?
Secure every exterior entry, confirm the basic utilities work, look for active leaks or immediate hazards, locate the main water shutoff and electrical panel, and test the smoke and carbon monoxide alarms. Once those checks are complete, set up a place to sleep, one bathroom, and a simple kitchen station.
Should I change the locks after moving into a new home?
For a home you have purchased, rekeying or replacing exterior locks is a sensible early security measure because you cannot know how many old keys exist. Update garage codes, keypads, smart locks, and security-system access as well. A locksmith can advise whether existing hardware can be rekeyed or should be replaced.
What should a first-time homeowner check immediately?
Check locks and access, working utilities, visible leaks, smoke and carbon monoxide alarms, the thermostat and HVAC filter, the main water shutoff, and the electrical panel. Prioritize anything affecting personal safety, water damage, fire risk, or the ability to heat or cool the home.
How long should it take to unpack after moving?
There is no correct deadline. During the first week, focus on the rooms and belongings you use daily and keep exits and walkways clear. The rest can be unpacked gradually. Taking longer does not mean you are behind; it can lead to better layout and storage decisions.
What should I buy during my first week in a new house?
Buy only what solves an immediate, verified need: appropriate alarm batteries, the correct HVAC filter, cleaning basics, a flashlight, first-aid supplies, or a missing bathroom or kitchen essential. Measure before buying furniture or organizers.
A Better Goal for Your First Seven Days
Your first week should create stability, not a finished reveal. By the end, the home should be secure, its essential systems and alarms should work, and its important controls should be accessible. You need a place to sleep, a usable bathroom and kitchen, and a manageable plan for what comes next.
Everything else can develop as you learn the house.
Unpack the essentials first. Correct an uncomfortable layout before committing to it. Keep urgent repairs separate from future ideas. Most importantly, give yourself permission to organize gradually. A home becomes easier to manage when its systems support real daily life, not when every box disappears as quickly as possible.